Sagging in the shoulders, losing connection with the core, arching the back or swinging the legs in all directions will not only make it difficult for you to balance upside down, but also might contribute to developing bad habits, which will be challenging your progress. So let's build some solid handstand foundations first, starting from the very beginning. If you are afraid of doing the exercises on your own, ask someone for help. Be sure to explain the exercise you intend to do so that the spotting person knows what to expect. Shall we start?
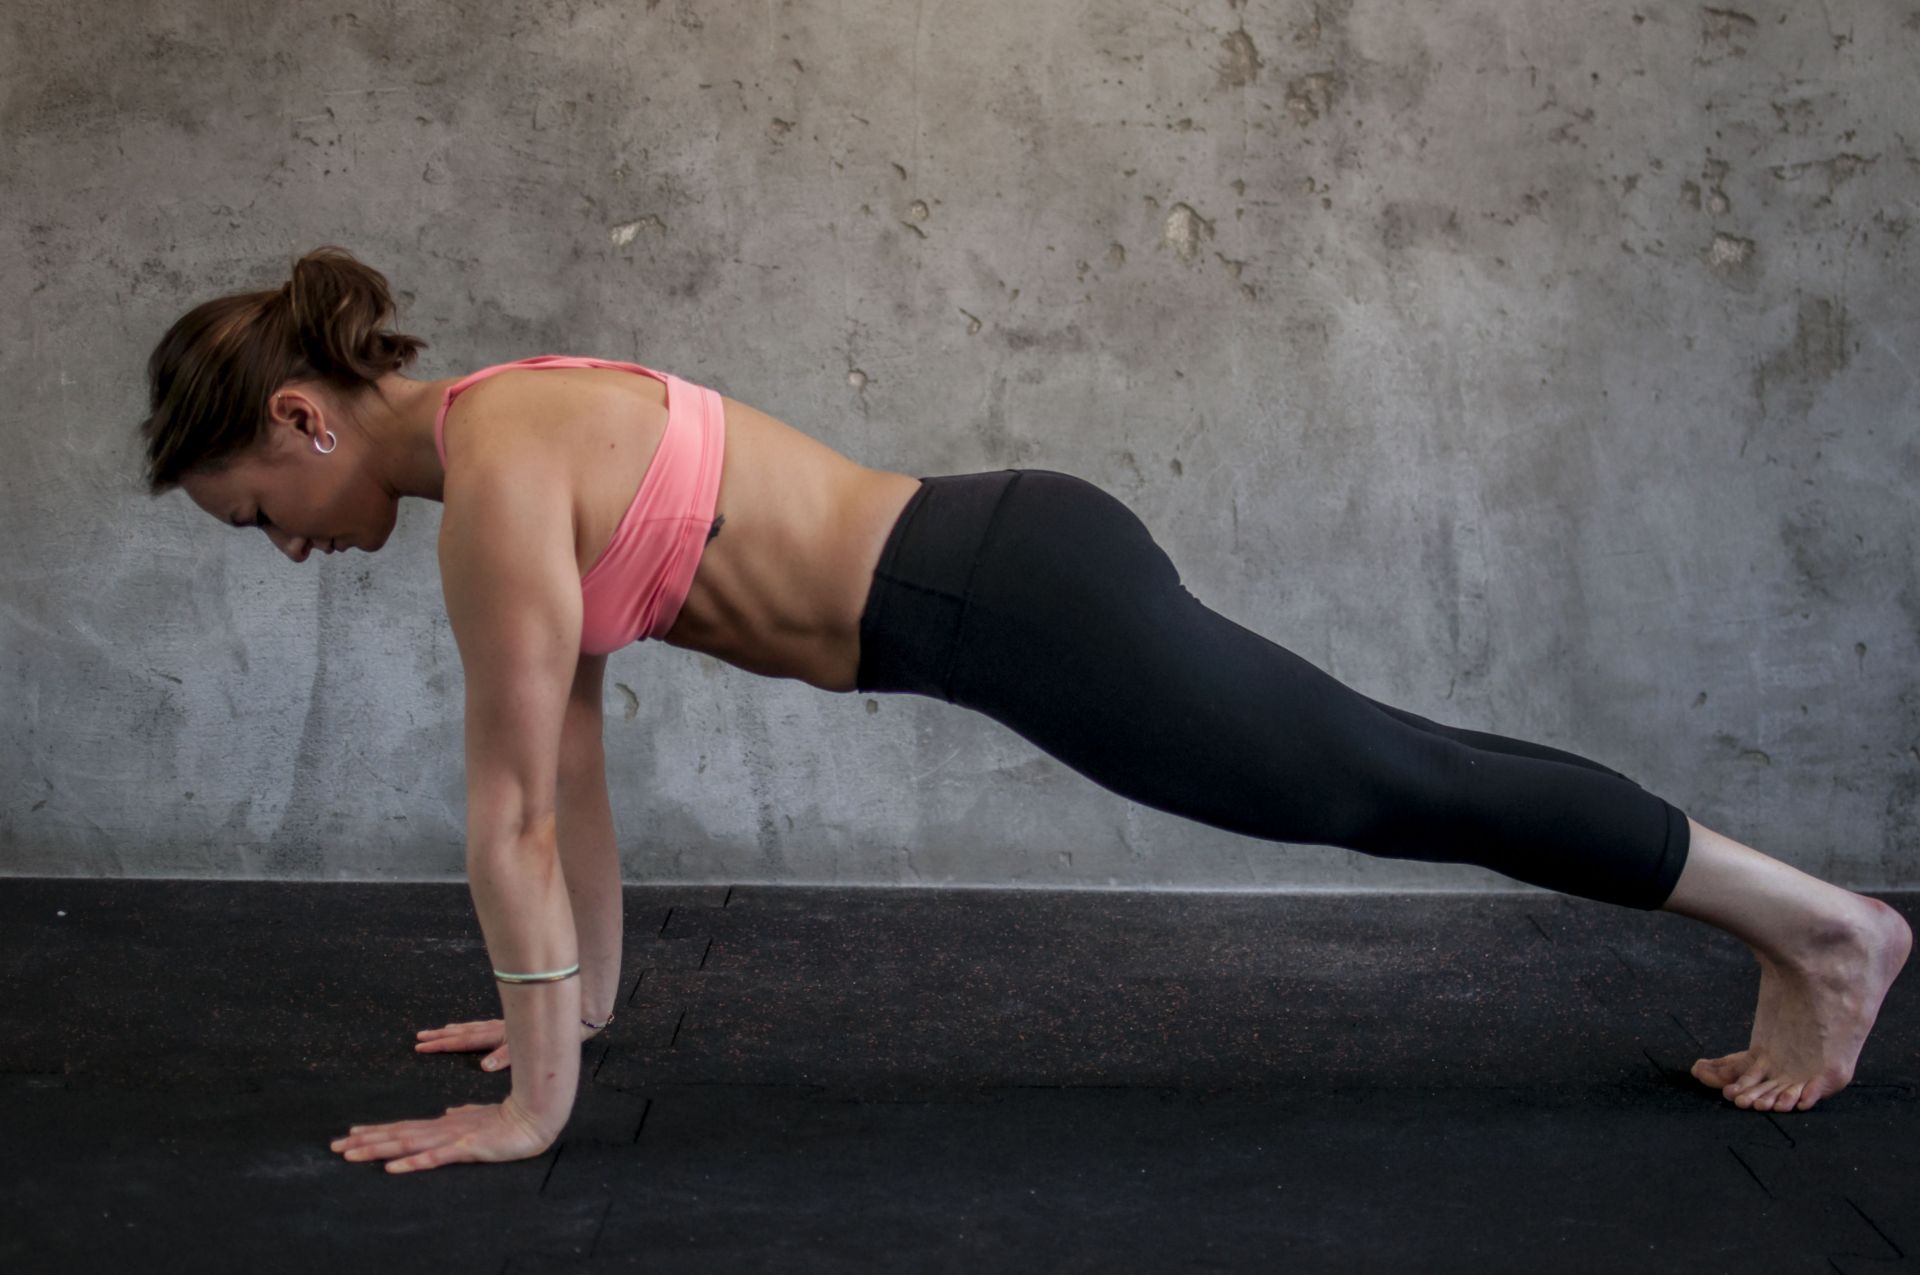
One perfect exercise, to help you understand the idea of body tension, is plank. To do it come to all four - put your knees on the floor, under your hips, and your hands under your shoulders. Keep your arms straight, and spread your fingers wide apart, squeezing the floor with your fingertips. Then, tuck your pelvis under, lift your knees up and straighten both legs, resting on your toes. Keep your feet together, straighten your legs, squeeze the buttocks, pul the belly in, towards your spine. Don't be lazy - the body should be tight!
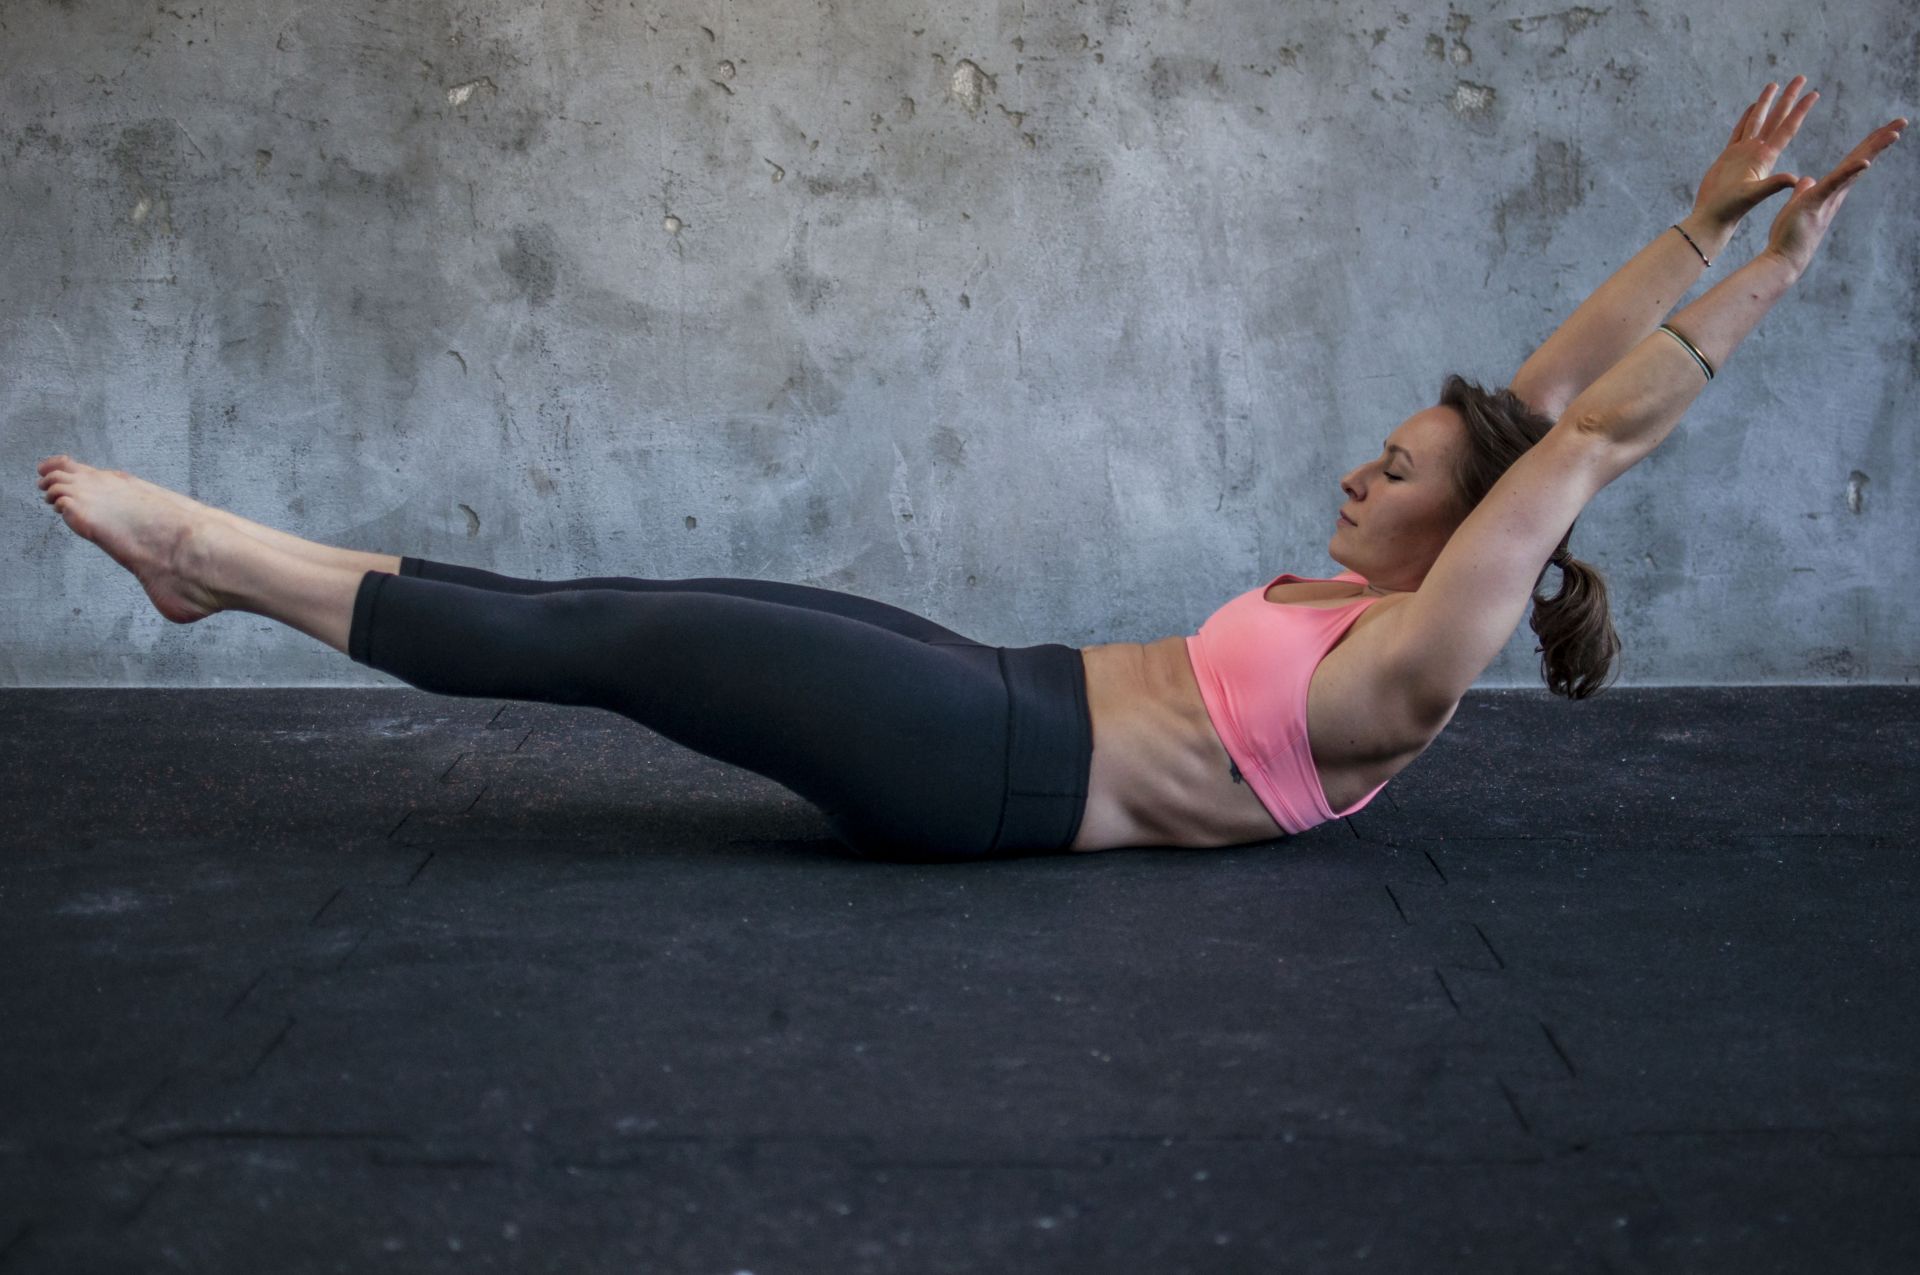
Hollow body is a basic exercise for all acrobas and it strengthens the whole body, so let's explore it! It teaches you how to tense your muscles and keep your shape, and will engage your core. All of these points are crucial for your handstand practice! To do the exercise, lie on your back and bring your knees towards your belly. Reach your straight arms over the head, keeping your hands shoulder-width apart and hugging your biceps around your ears. Lift your head, arms and shoulders off the ground. Pull the ribs and navel towards the spine. Straighten your legs and keep your feet above the floor. Keep your lower back on the floor as well. Hold this position for a few seconds. If you feel your abs working hard - good job! That's exactly what we want here. Come back to these exercises often, to gradually gain strength and build the good habits from the beginning of your journey.
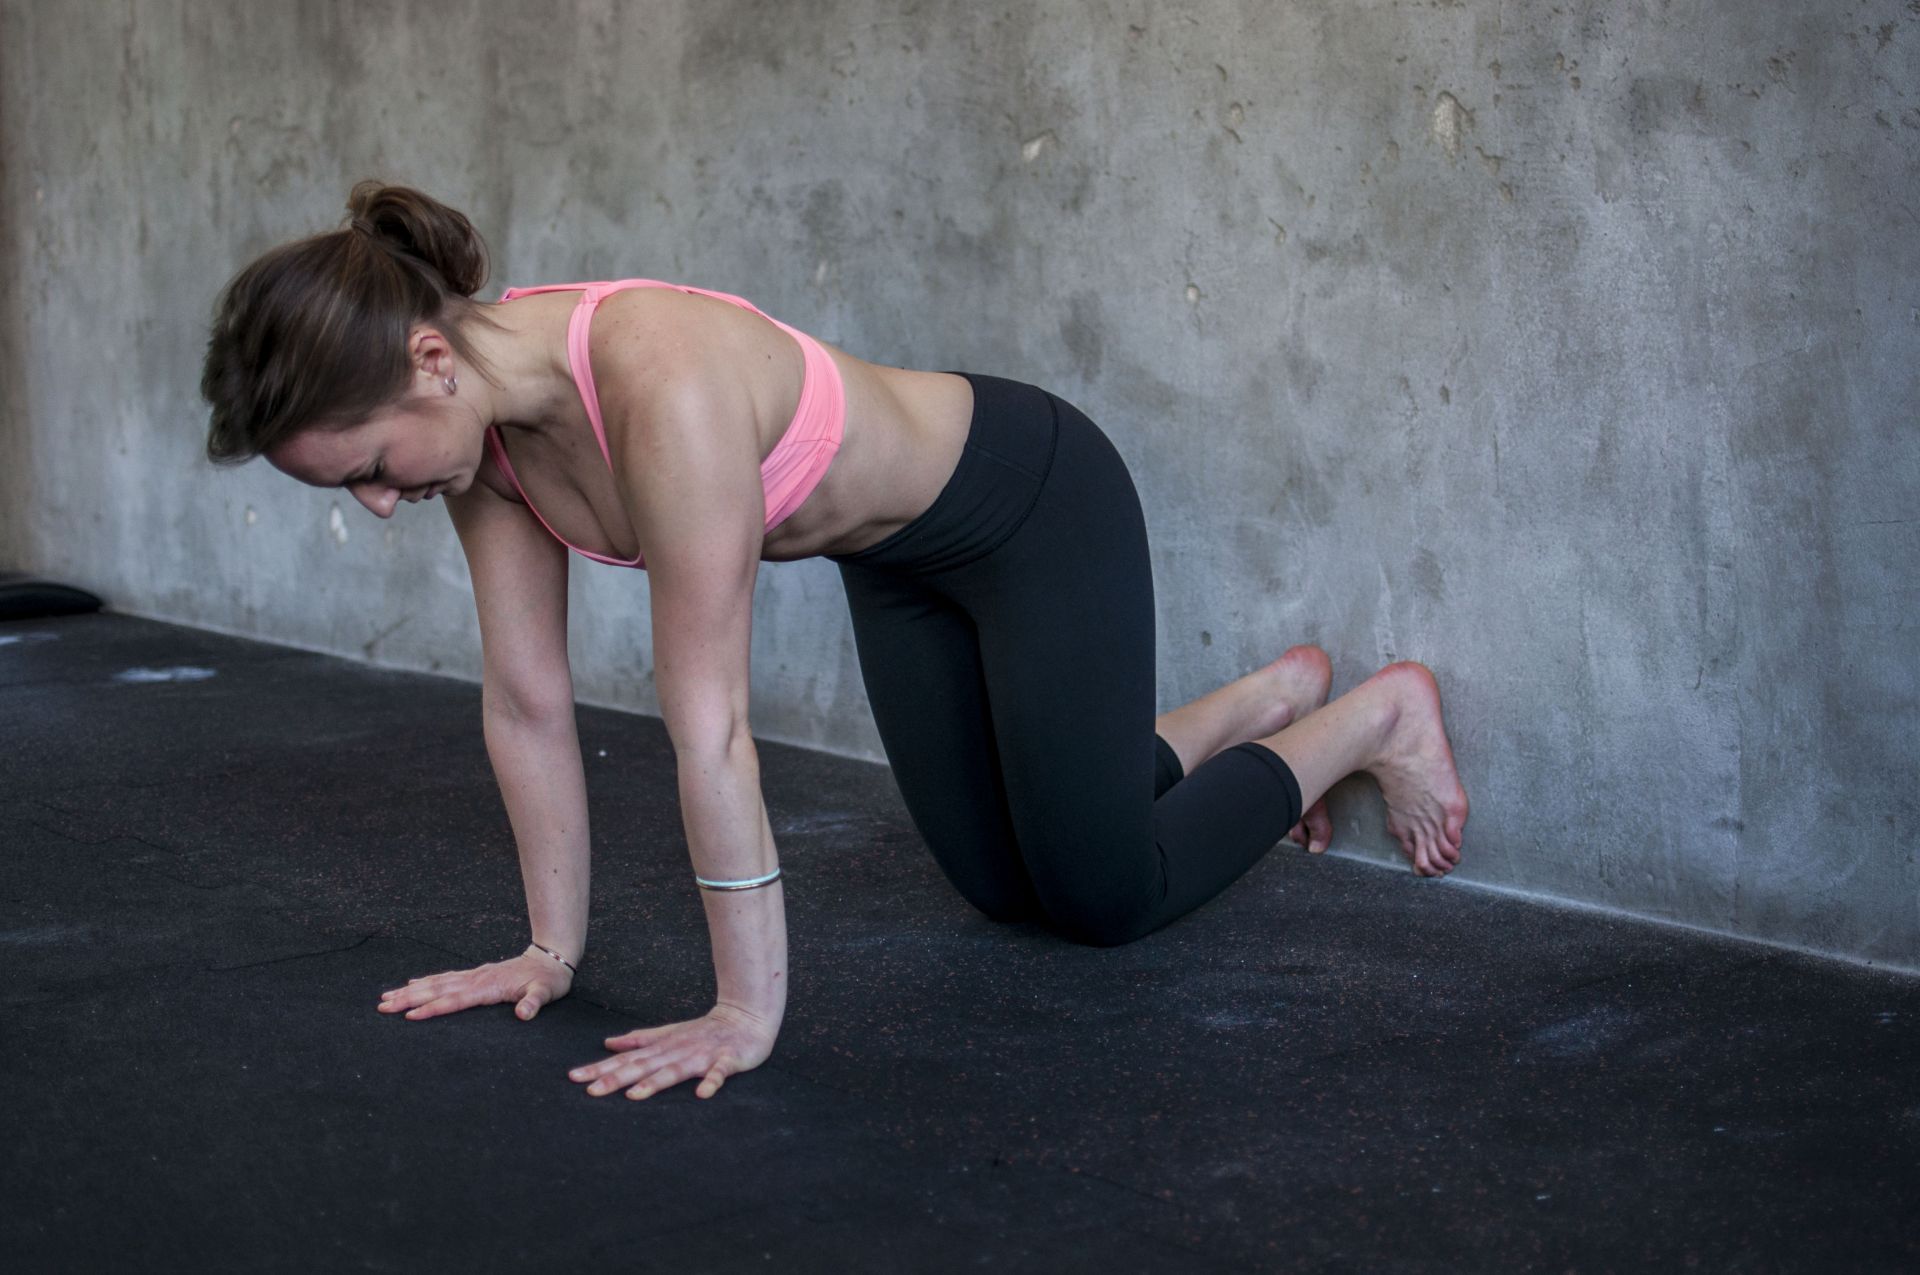
If done correctly, wall exercises can significantly accelerate the process of learning handstand. Thanks to them, we slowly gain confidence in being upside down, strengthen our upper body and gradually overcome the fear of moving our hips over the head. The easiest exercise is the so-called "L-shape". Come to all four and let your feet touch the wall. Take care to keep the knees under the hips and keep the shoulders above your hands. Place your palms flat on the floor, shoulderwidth apart, with your fingers spread wide and grabbing the floor. Lift your knees up and place your feet on the wall, at the level of your hips. Do not put your feet higher than your hips.
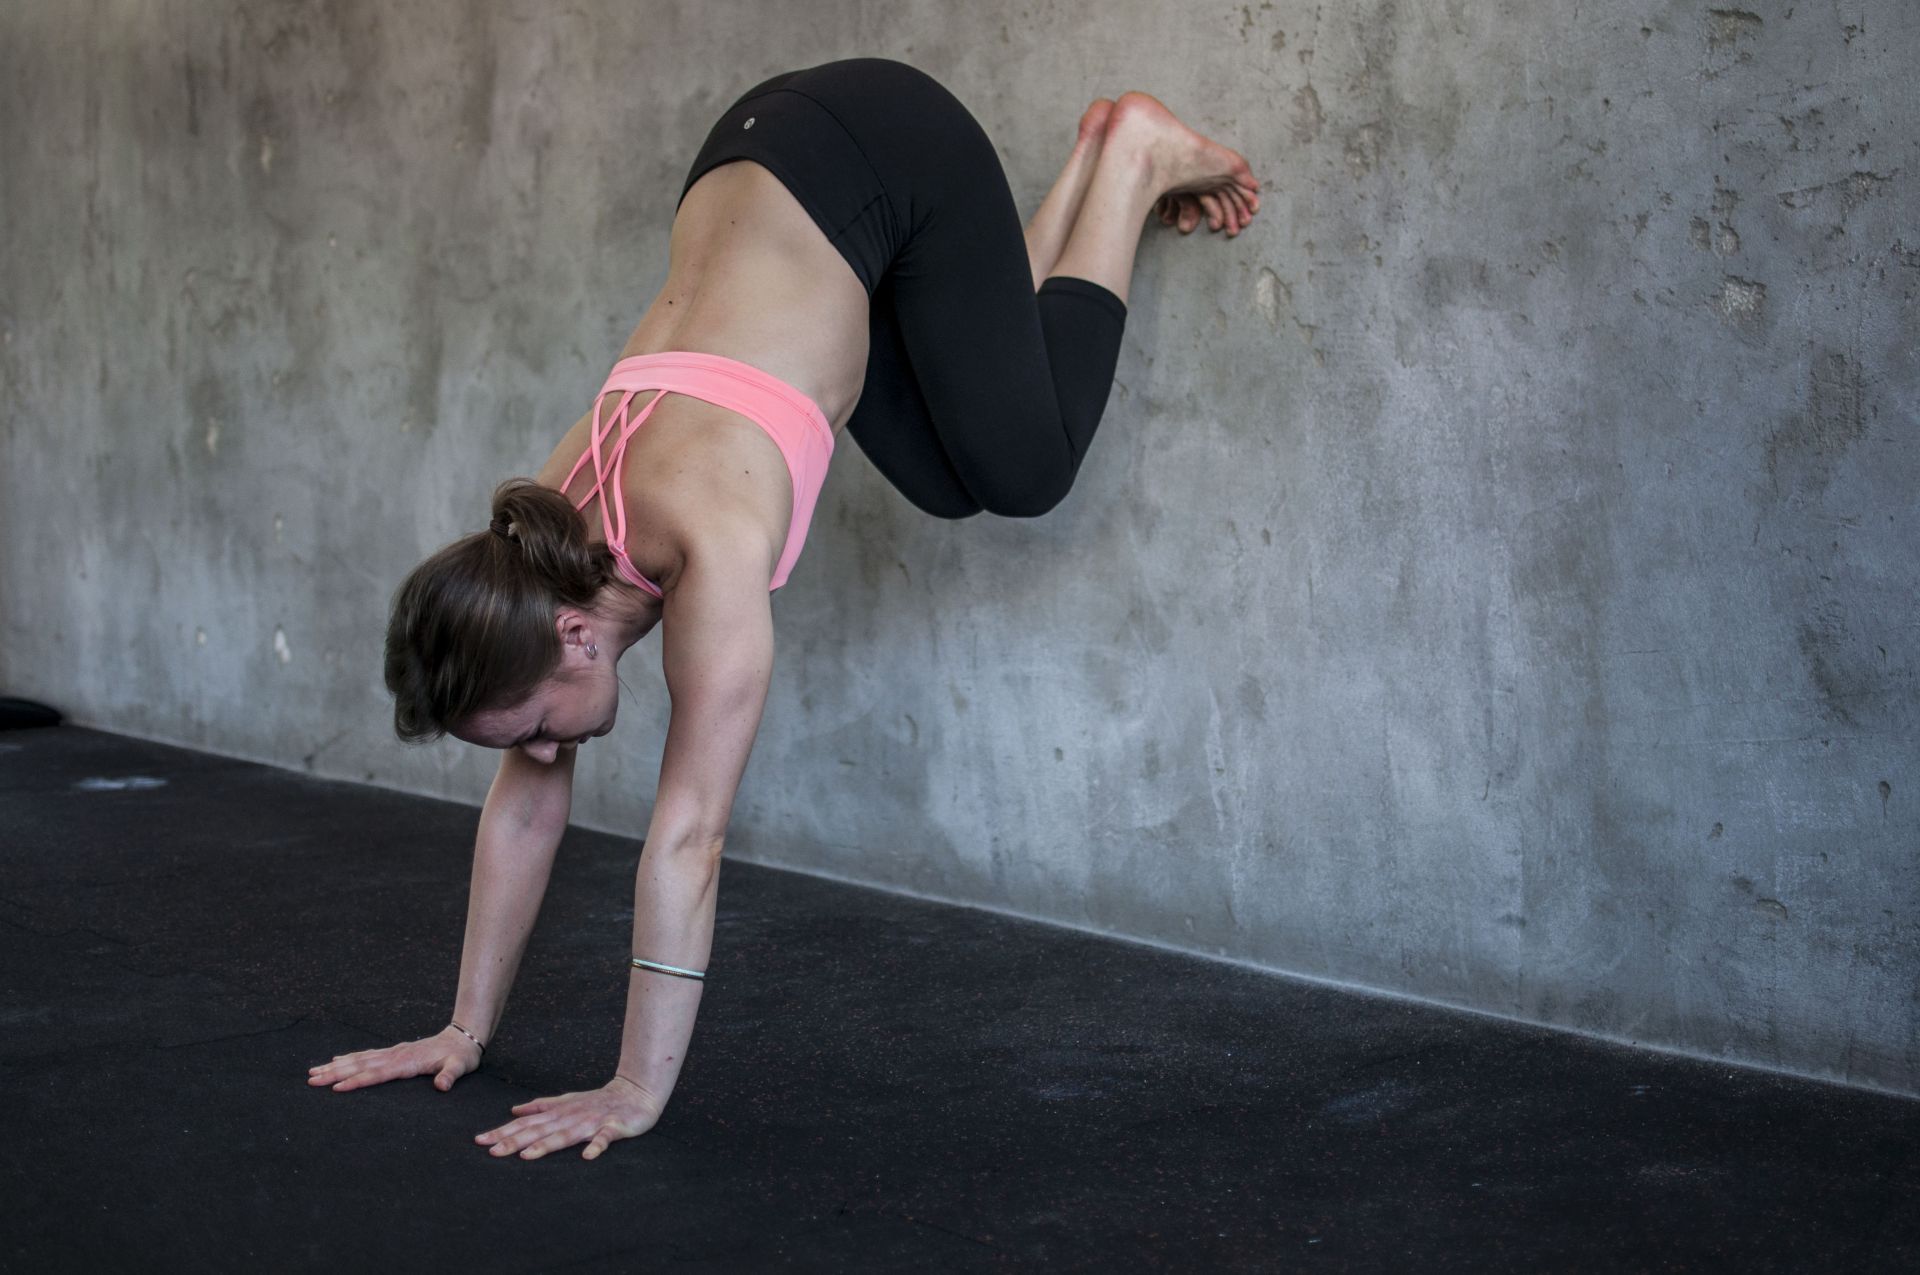
Move your shoulders back above your hands if they have moved towards the wall. Then straighten your legs and bring your hips above your shoulders, keeping your arms in line with your hands all the time. Don't move the shoudlers forward, beyond the line of your fingers - this is very important for safety and stability. Look between your thumbs or wrists. Keep your ribs in and your back straight. Ultimately, your hips should be in a 90 degrees angle.
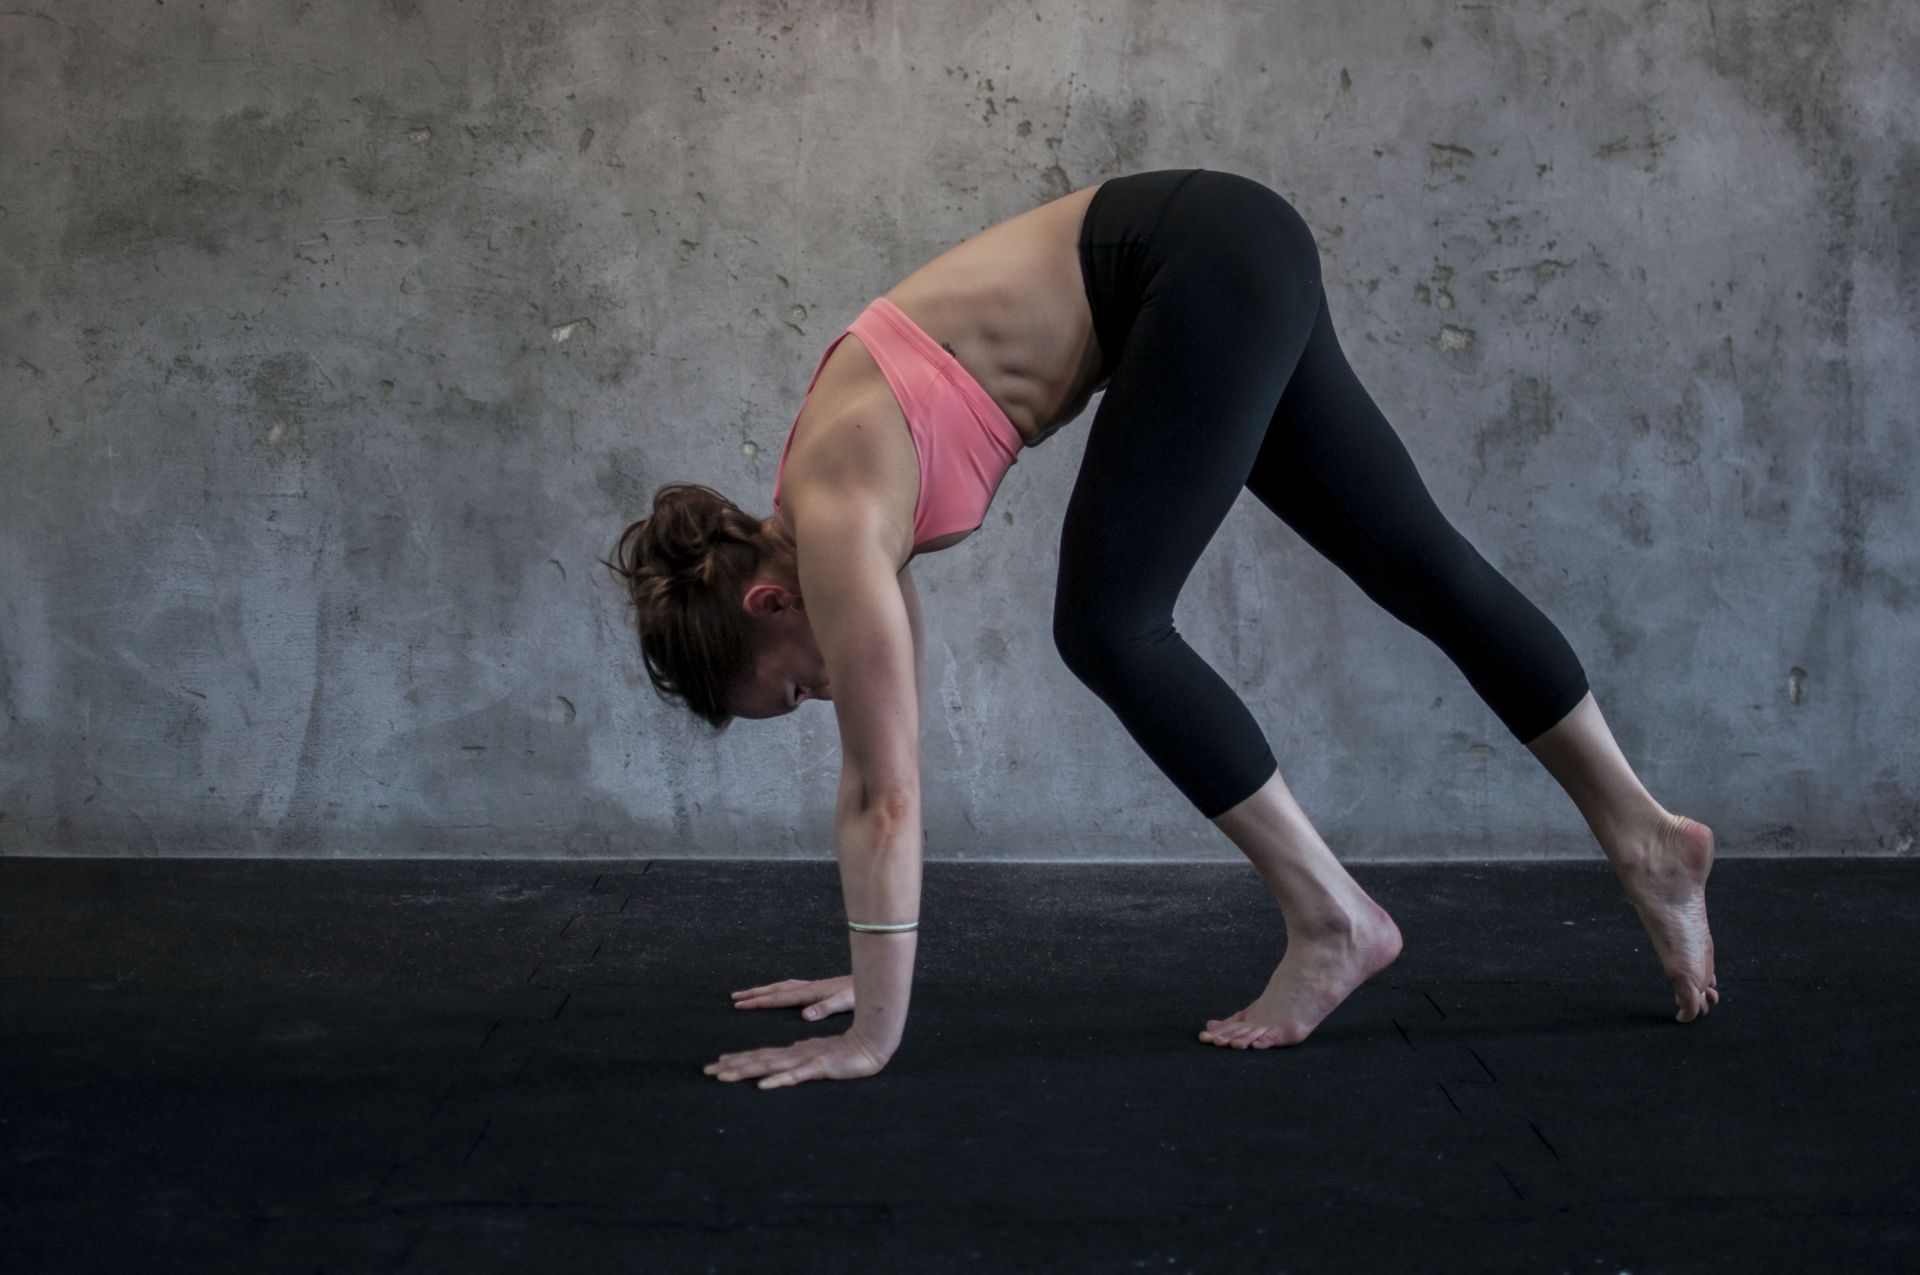
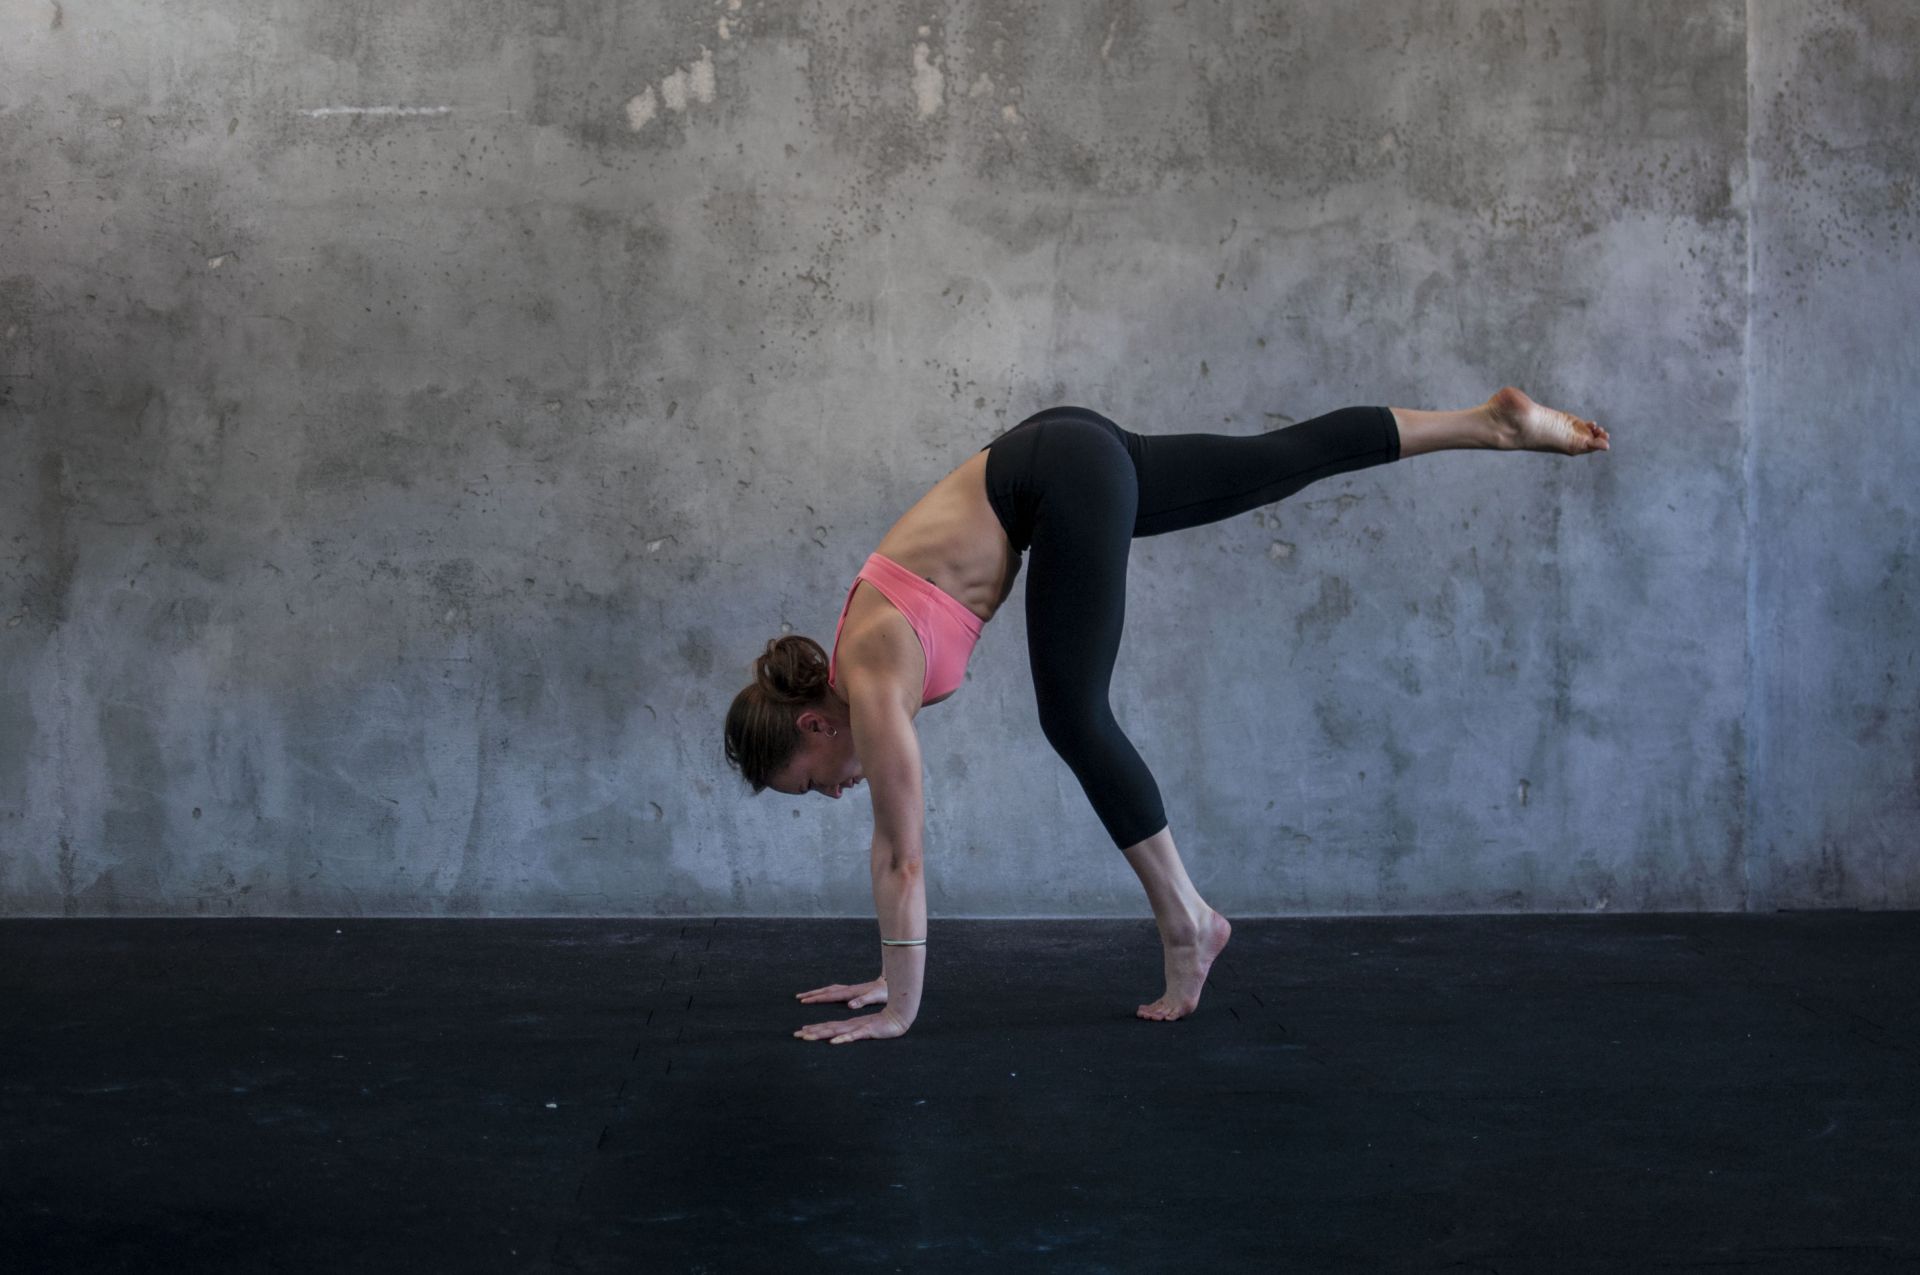
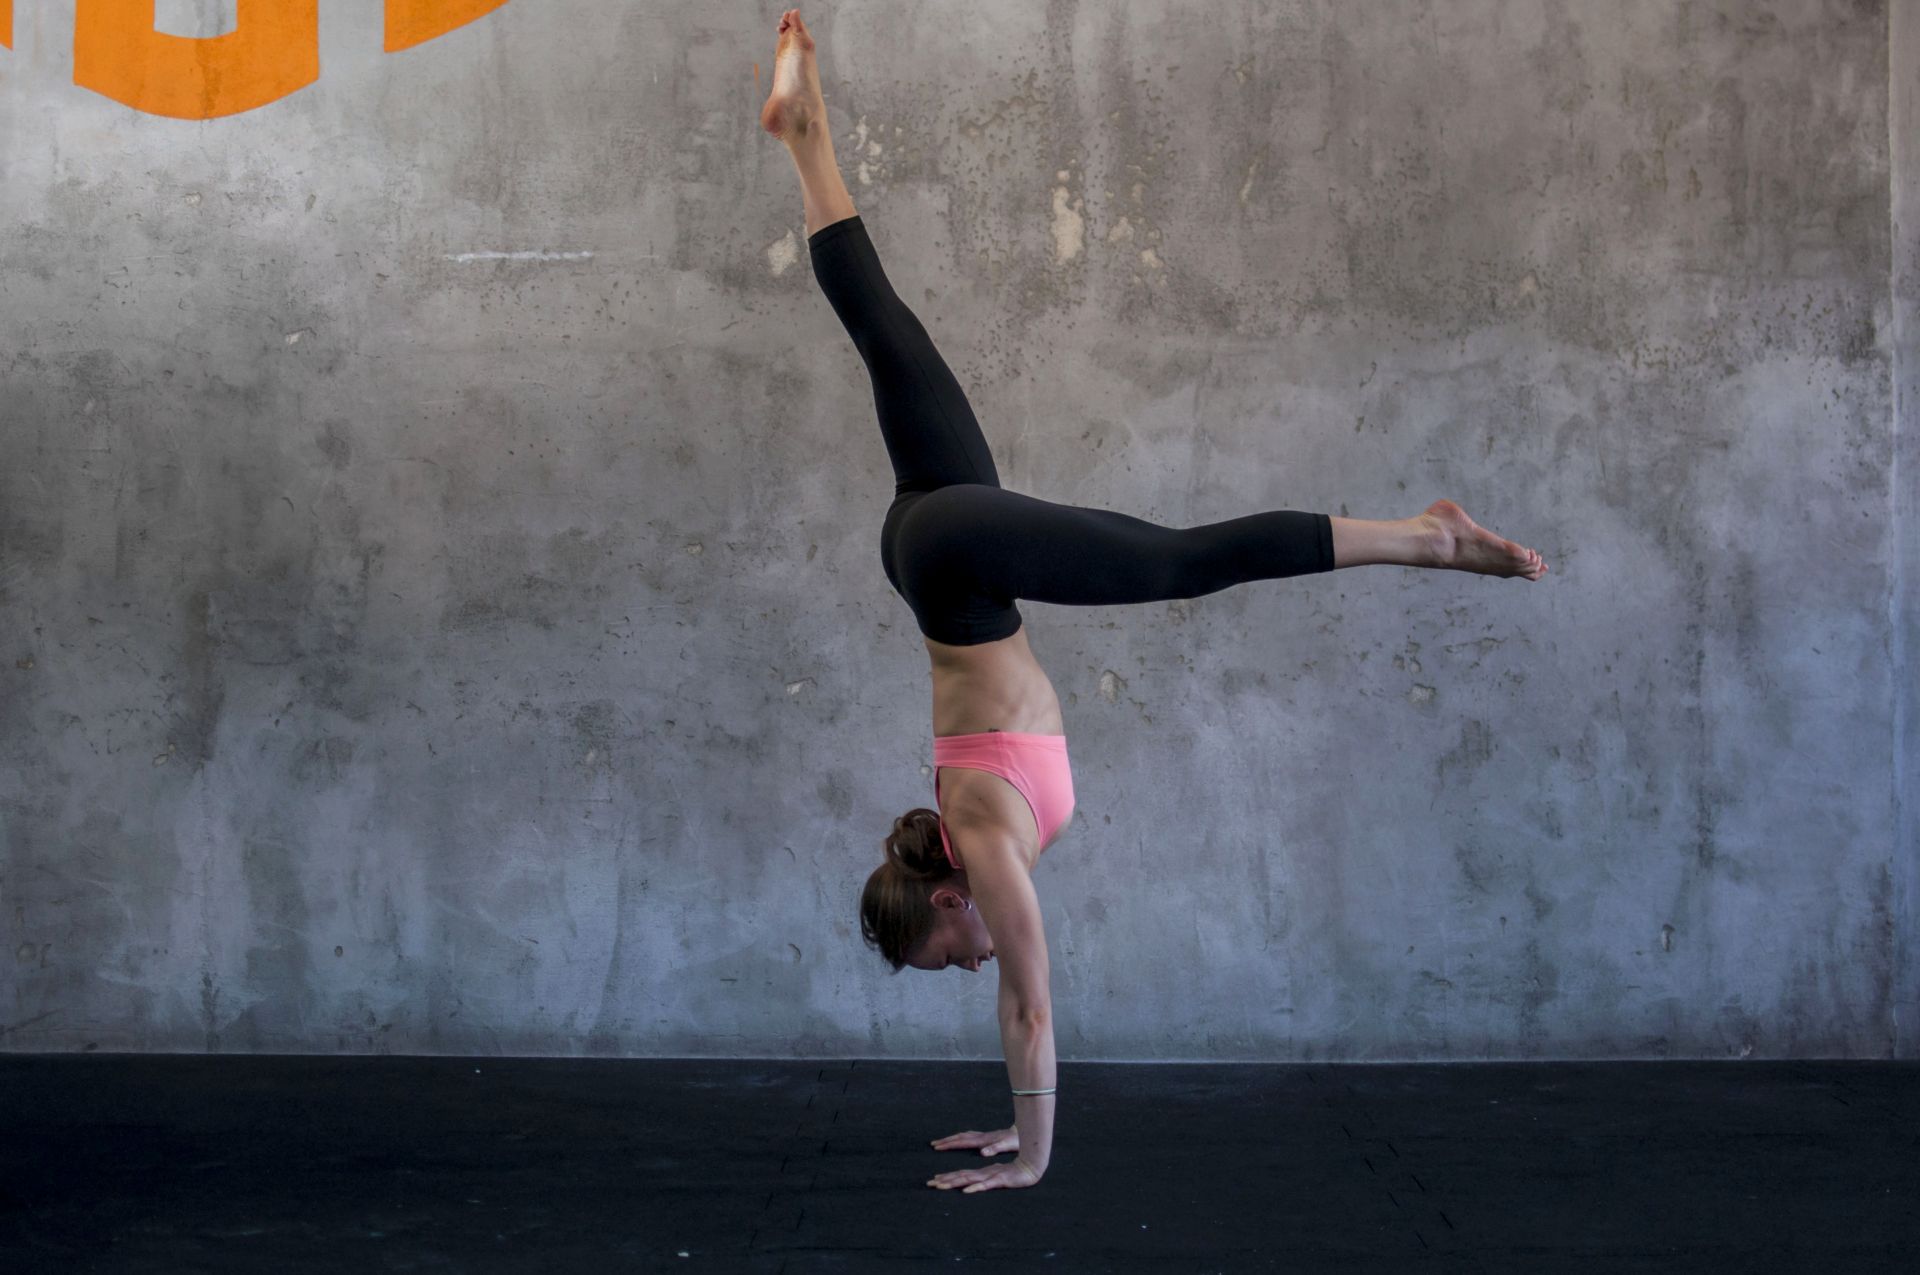
Then, put one foot closer to your hands and lift the other leg up. The foot closer to your hands should be somewhere halfway between your hands and the back foot when it's on the floor (look at the photos to figure it out). Then, while keeping your "cat back" or "ribs in" kick off the floor with the foot closer to your hands and pull yourself upside down, using the other leg, which is in the air and the strength of your core. Keep the lower leg in L-shape until you find balance. Then, you can slowly connect them in the air to come into a straight shape.
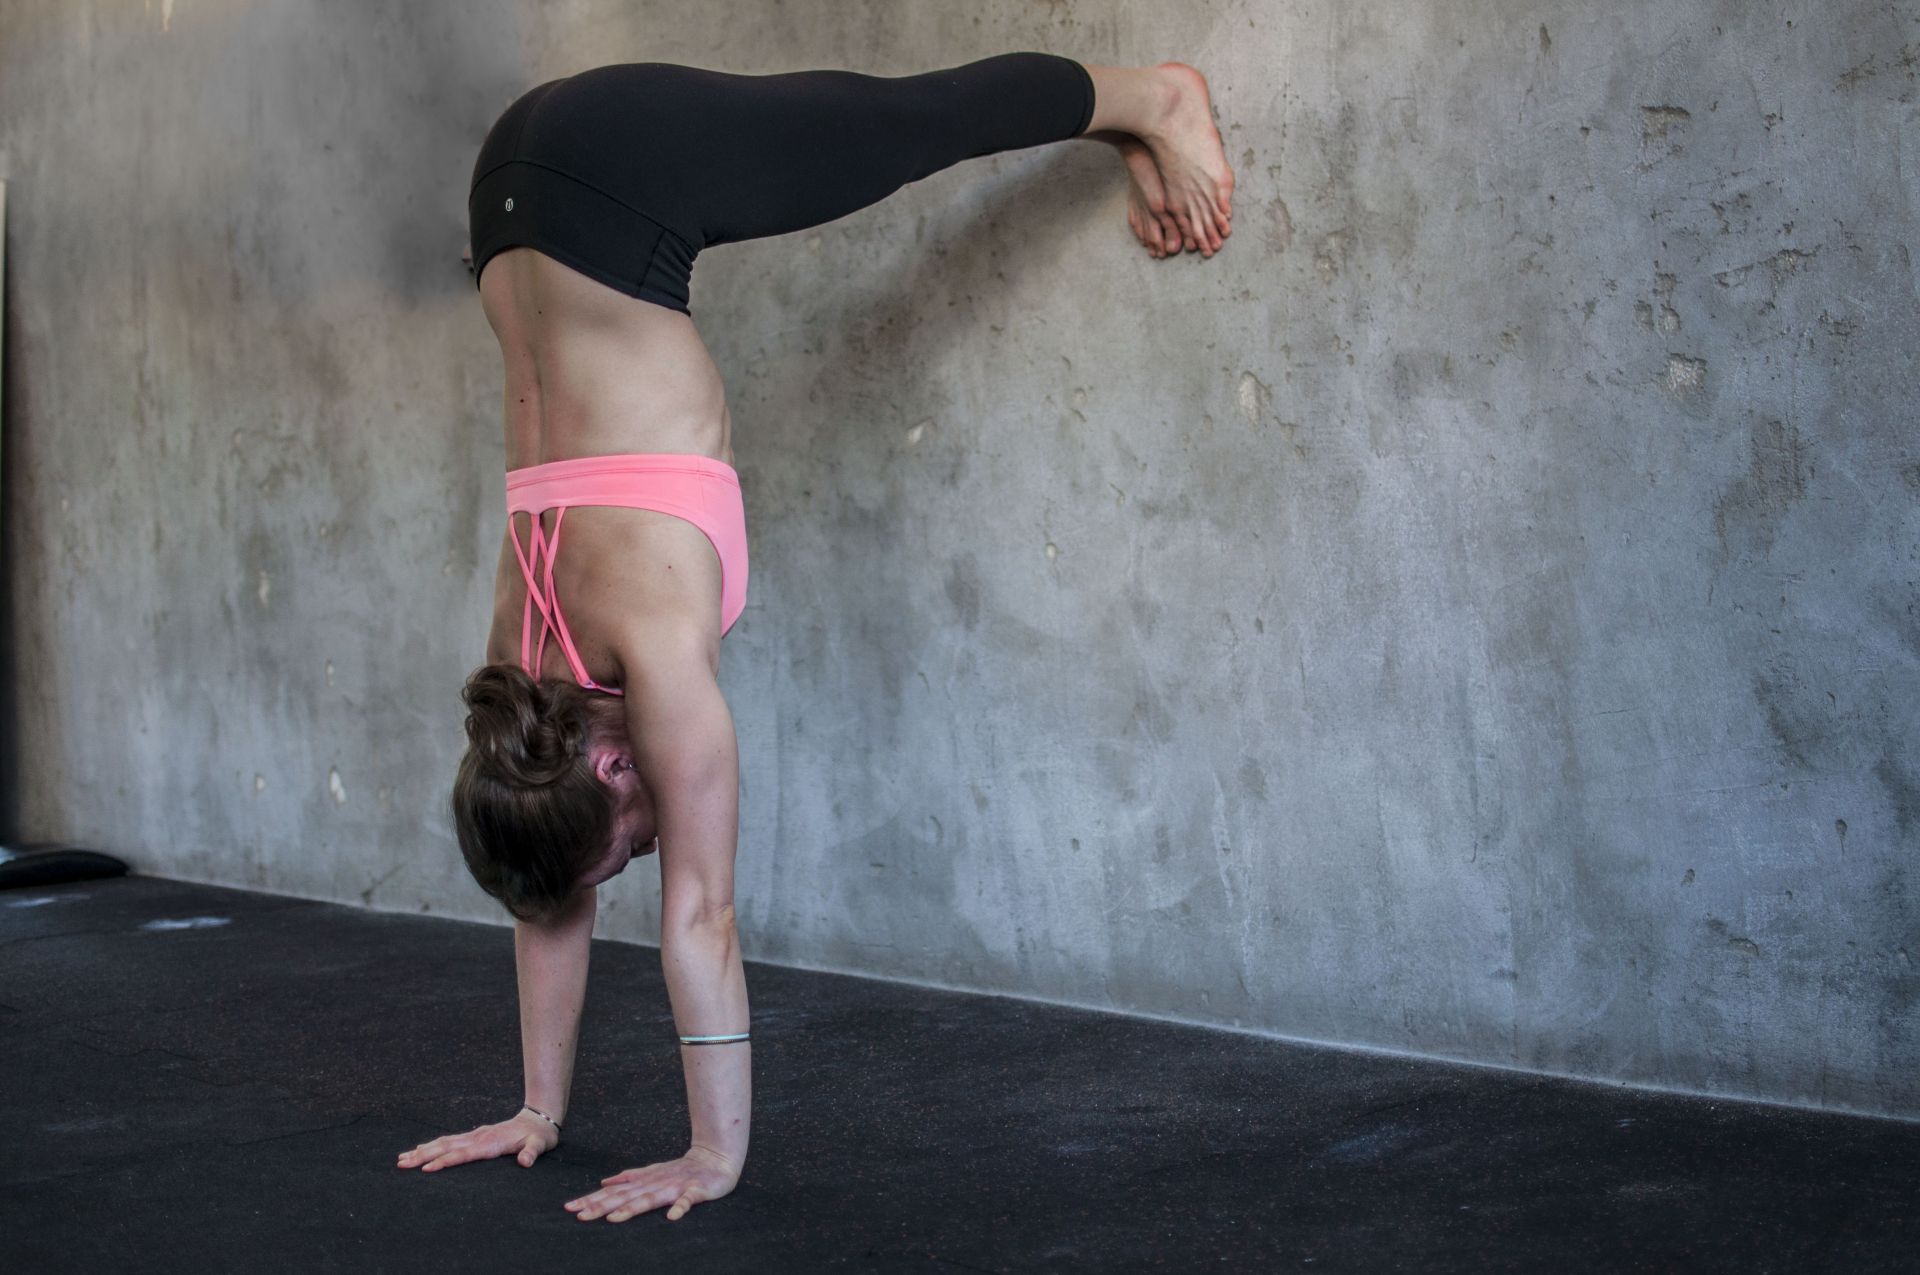
I'm not a fan of standing against the wall if both legs are against it. This position, although it strengthens our arms and makes us used to being upside down, it can also make us lazy and learn to hold an incorrect posture. There are some nice ways though, to do handstands against the wall, and here's one of them. Stand in front of the wall. Place your hands on the floor so that the distance between them and the wall is the same as the length of your shin bone.
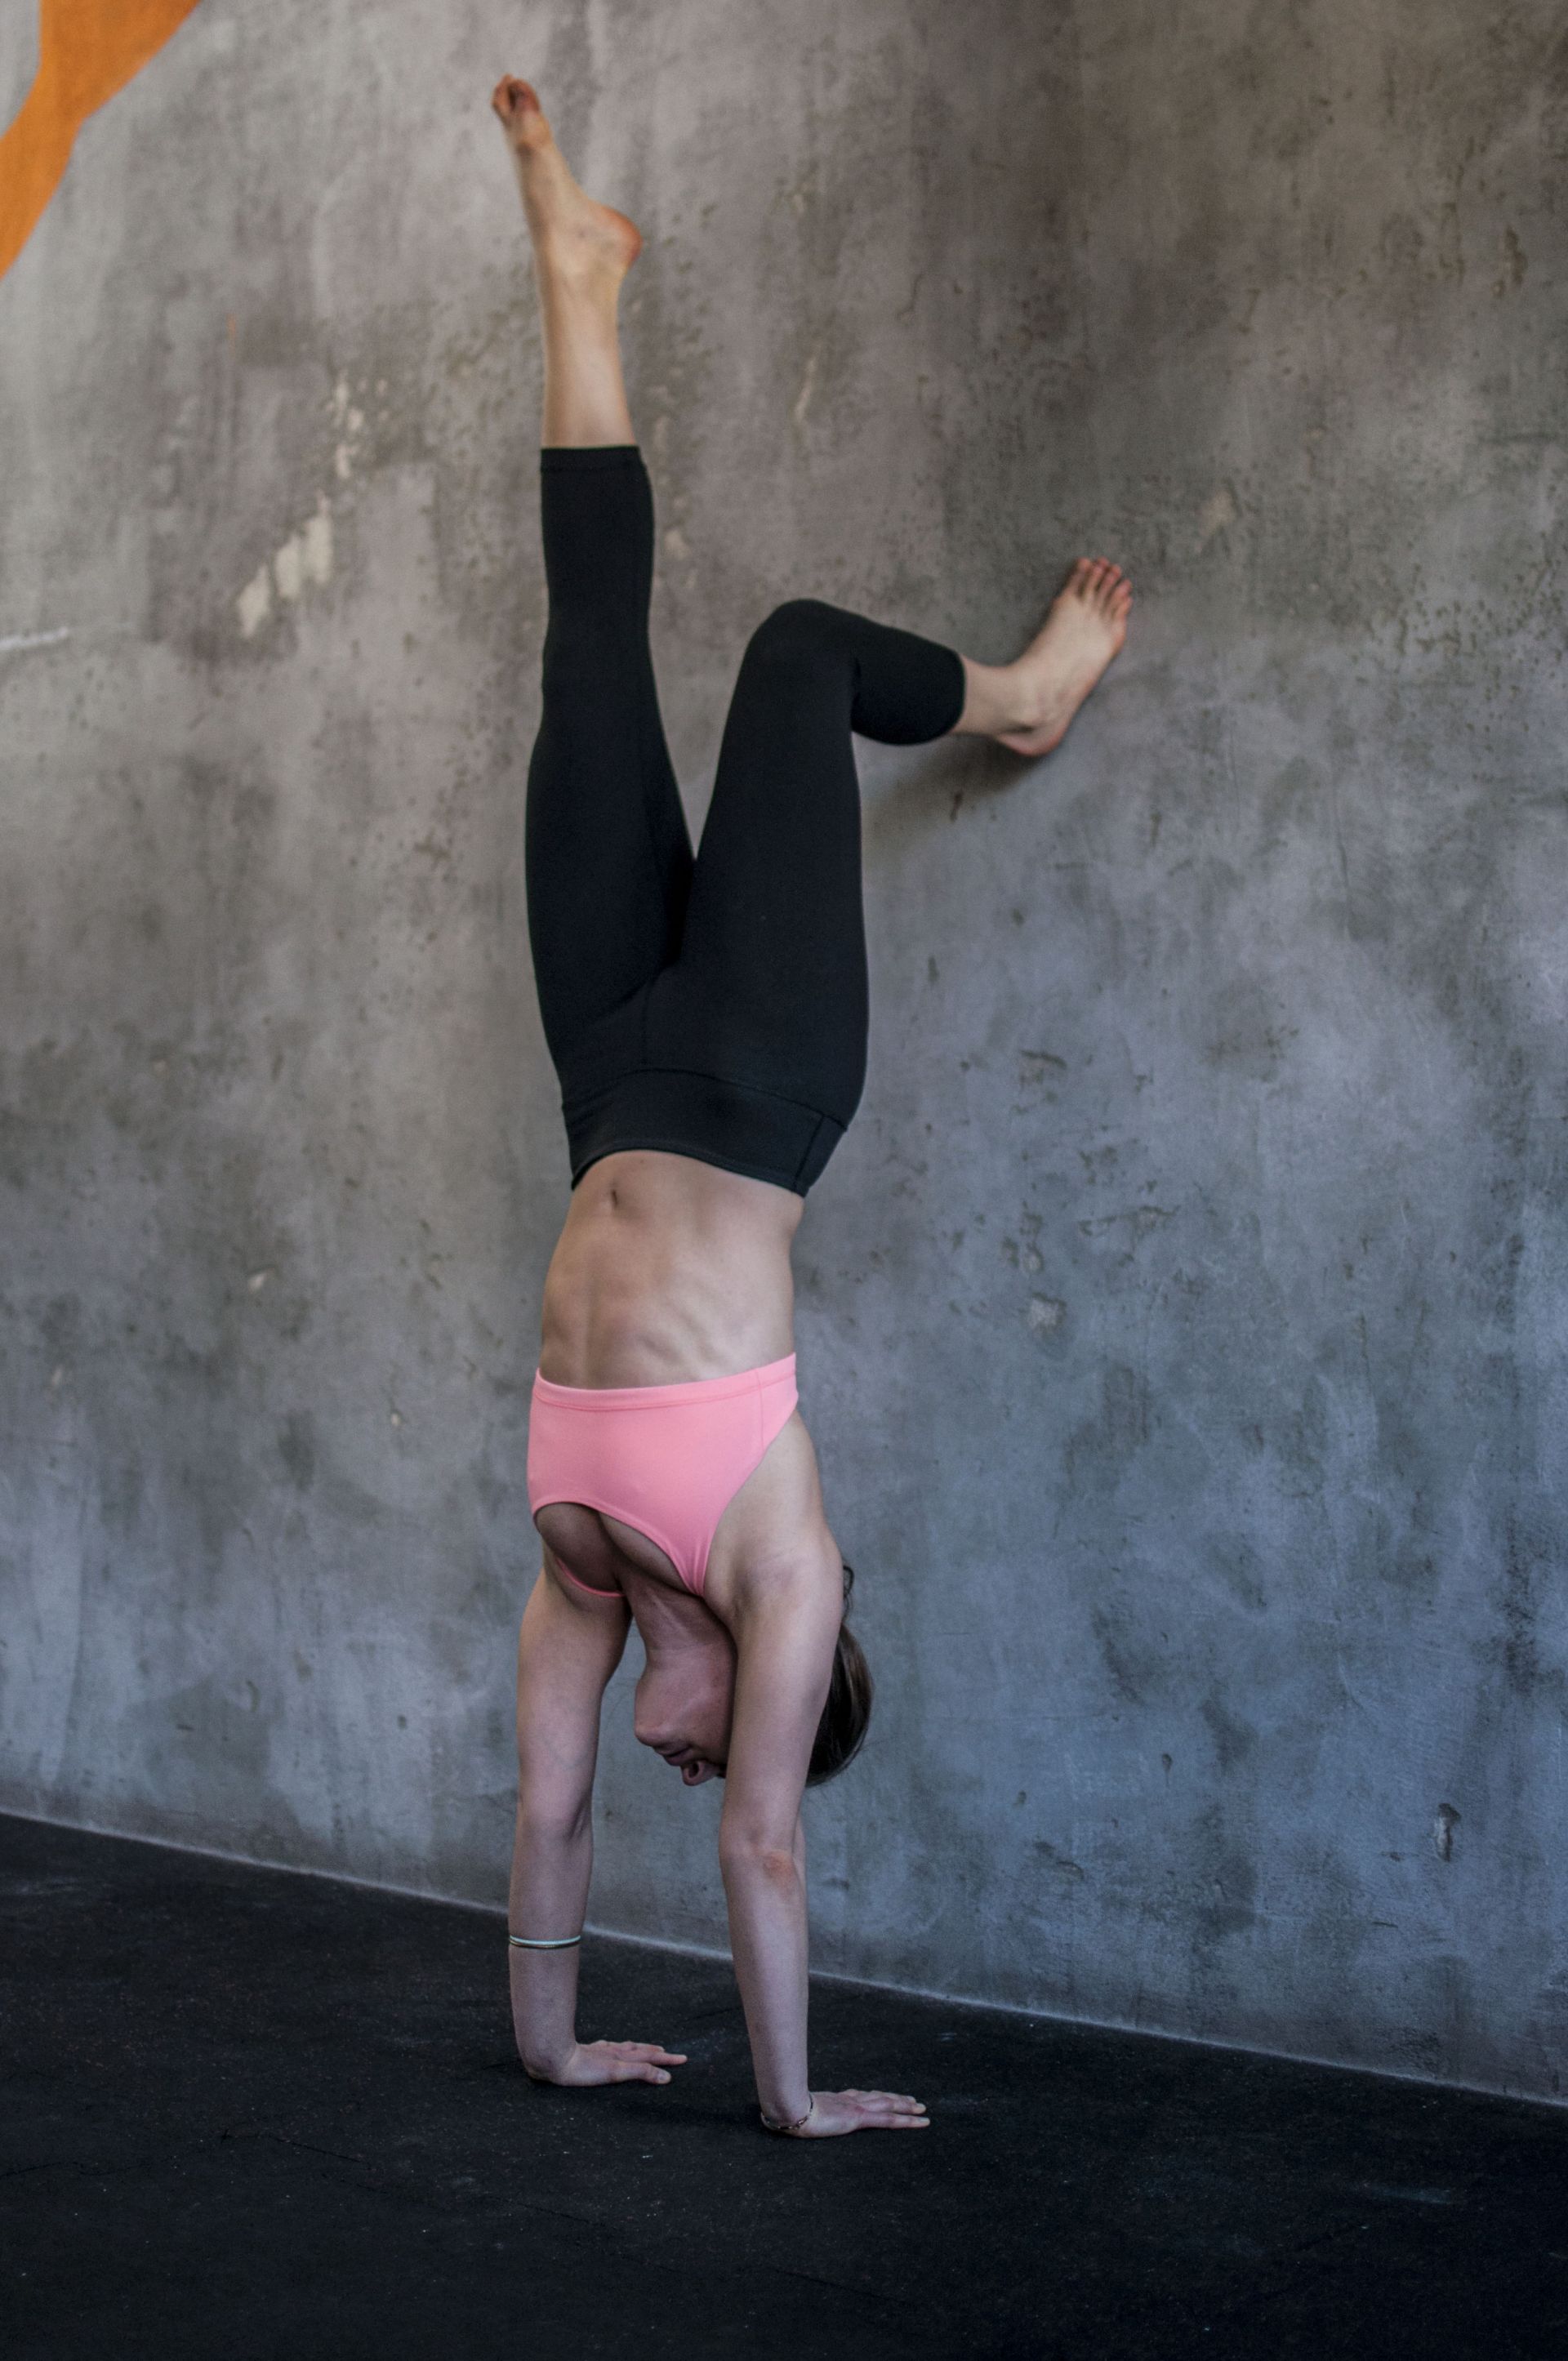
Remember to position your body correctly (see: kick-up) and jump into a handstand with both heels against the wall. Bend one leg at the knee and place that foot flat on the wall. Take the other leg off the wall and pull it straight up so that it forms a straight line with the rest of your body - your body should be straight from your wrists, through hips, shoulders and ankle. Tuck your pelvis under, pull your belly in.
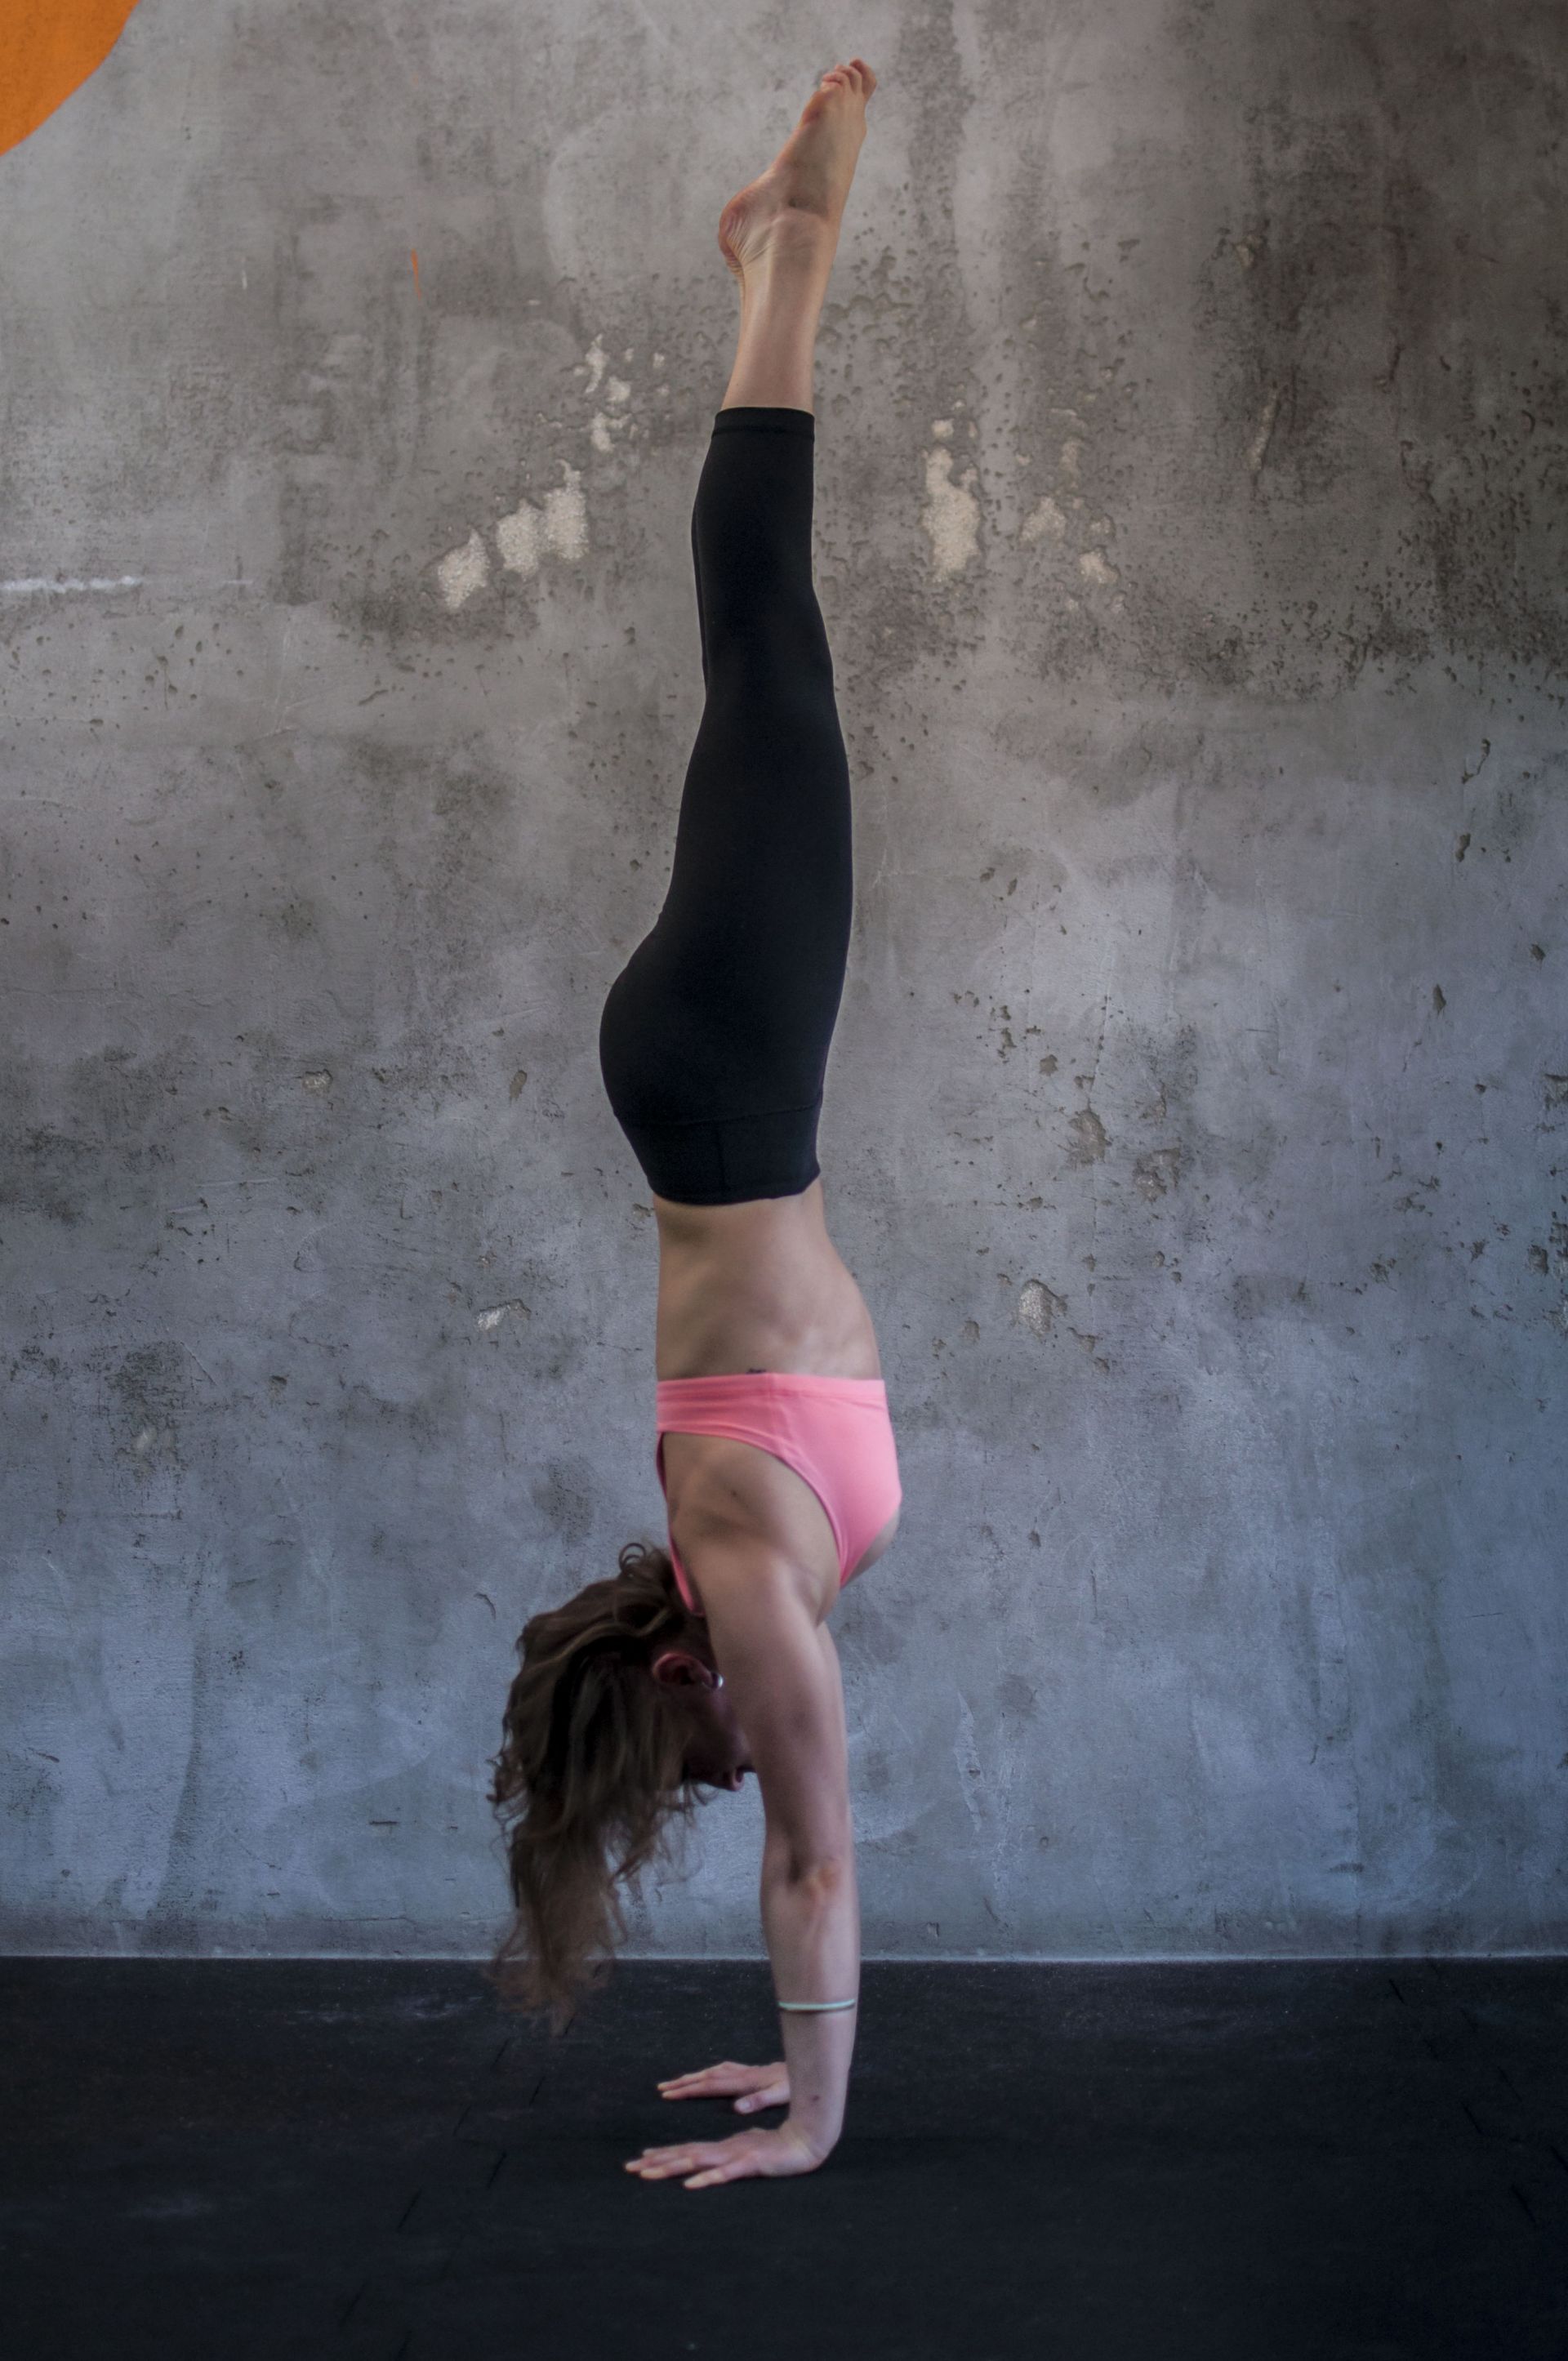
Straight handstand is quite a challenge and can take many hours of training before you feel confident enough to balance it without the help of the wall. When you begin having control over your handstand and get some experience with bailing out = not falling in case you loose balance, you can start doing your handstands in the middle of the room. If you want to learn straight handstand follow my guidance from "kick up" exercise and when you find balance in your L-shape simply connect both legs in the air. Remember to move slowly, because the faster and more hectic your moves, the more challenging it will be to balance yourself. Move slow, keep your legs straight and keep your pelvis tucked under.
Handstand is a great adventure and it's lots of fun. Don't get frustrated if something doesn't work out or you don't have the strength in the beginning. With a little patience and regular training, you will build strength and increase body awareness, and each step will lead you further and closer to your destination. However, don't take the path to handstand as a serious challenge - enjoy it, play with it, don't take it too seriously! And remember that anyone who can do a handstand today was once a beginner.
The original article was published in Polish on the HelloZdrowie.pl website. You can find it here: https://zycie.hellozdrowie.pl/artykul-stanie-na-rekach-krok-po-kroku/
Want to learn how to do a handstand step-by-step? Check out my handstand courses HERE!